Dahi Recipe By The Spicy Trail | Yogurt Recipe | Dahi Jamane Ka Tarika | How to Make Yogurt at Home
Embark on this culinary voyage as we joyfully introduce a timeless favorite: the versatile and delightful Dahi recipe, better known as Yogurt. This cherished creation transcends cultures worldwide, celebrated for its creamy texture and invigorating taste. Whether you’re seeking the “Dahi Jamane Ka Tarika” or keen on learning “How to Make Yogurt at Home,” this comprehensive blog is your ultimate companion on the journey to mastering the art of crafting this beloved dairy treasure within your own kitchen. Through this meticulously crafted recipe, rest assured that your yogurt will attain a luxurious thickness, devoid of any excess water content.
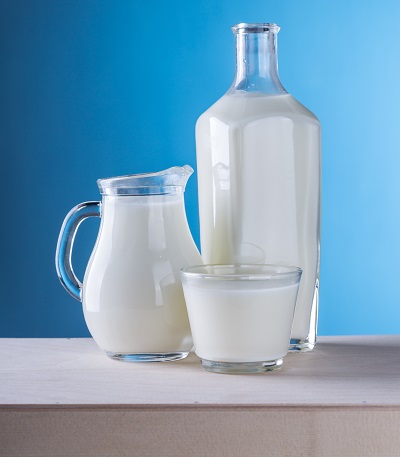
Yogurt, a result of the magical transformation of milk through fermentation, has deep roots in culinary history. From the Mediterranean to Asia, its origin is traced back to ancient times. Packed with probiotics, calcium, and essential nutrients, yogurt offers a plethora of health benefits, aiding digestion and boosting immunity. This creamy delight has earned its place as a staple, gracing breakfast tables, becoming the base for savory and sweet dishes alike. Its global popularity showcases its adaptability and the sheer joy it brings.

The journey to crafting the perfect yogurt begins with a few simple steps. As we dive into the method, let’s touch upon the key components that make this process truly magical. It’s a delicate balance of time and temperature, nurturing milk to develop its rich and creamy consistency. The transformation from milk to yogurt is a captivating process that unveils the true essence of patience and culinary artistry.
Now, as we prepare to delve into the heart of this recipe, take a moment to gather your ingredients and equipment. You’ll need the freshest milk, a small portion of existing yogurt as a starter, and a clean container to incubate the mixture. Find a cozy spot for your yogurt-to-be, as maintaining the right temperature is key to success. Get ready to embark on this culinary journey that promises not just a delicious outcome, but also a connection to the age-old tradition of crafting your own yogurt.
Embark on this enlightening expedition with us, revealing the alchemy behind turning milk into the luscious delight we know as yogurt. Anticipate a journey that’s as enriching as the ultimate creation it yields. With no more delay, let’s initiate our path to becoming yogurt artisans, crafting a treat that promises to indulge your palate and invigorate your well-being. Remember, while you proceed, ensure the use of fresh milk instead of UHT milk for optimal results.
Ingredients
Instructions
- Begin by heating milk in a pan until it reaches a boiling point. As it starts to boil, gently mix the milk for about 2 minutes to ensure even heating & reducing the unwanted water content.

- Reduce the flame to low and allow the milk to simmer for 6-8 minutes. This step helps eliminate any water impurities.

- After the designated time, transfer the milk to a bowl. For optimal results, a clay bowl can be used. If you prefer your yogurt less tangy, you can add a tablespoon of sugar at this stage. Mix the milk again for an additional 2 minutes.

- Allow the milk to cool down until you can comfortably dip your finger in it for 2-3 seconds without getting burned.

- In a separate bowl, combine 1 teaspoon of room temperature yogurt with 1/2 teaspoon of water. Then, gently place small portions of this mixture in 2 to 3 spots at the corners of the milk-filled bowl. Opt for the corners rather than the center.

- Using a spoon, lightly mix the milk only in the areas where the yogurt mixture has been placed.

- Cover the bowl first with a lid and then with a thick cloth. Let the mixture rest undisturbed for 6-8 hours. It’s important not to exceed the 8-hour mark, as this might lead to overly sour yogurt.

- After the incubation period, remove the covers. Your milk should have transformed into yogurt by now.

- Refrigerate the yogurt for around 2 hours. This step helps in enhancing the texture and flavor. Retrieve your bowl of homemade yogurt from the refrigerator. Congratulations, your delicious and creamy yogurt is now ready to be enjoyed!

Your journey to crafting delectable homemade yogurt has come to fruition, and the delicious results await your taste buds. Serve your freshly made yogurt chilled, allowing its creamy texture and subtly tangy flavor to captivate your senses. Enjoy it as a stand-alone treat, mix it with fruits and honey for a wholesome snack, or incorporate it into both sweet and savory dishes, showcasing its versatility.
Useful Tips
Creating yogurt is an art, and here are some key tips to ensure your batches turn out perfect every time:
- Milk Quality: Begin with fresh and good-quality milk for the best results.
- Temperature Control: Maintaining the right temperature during fermentation is crucial. Consider using a warm spot in your kitchen.
- Starter Yogurt: Use a high-quality plain yogurt with live cultures as your starter.
- Avoid Disturbance: Once the yogurt mixture is set for incubation, refrain from stirring or shaking the bowl.
- Incubation Time: Stick to the recommended incubation time to achieve the desired taste and consistency.
As you bask in the accomplishment of mastering homemade yogurt, our culinary journey offers an array of equally exciting recipes waiting to be discovered. From comforting classics to innovative creations, we invite you to explore the diverse range of dishes we have in store for you. Each recipe holds the promise of new flavors and experiences, reflecting the magic that happens when passion meets the art of cooking. Embark on these gastronomic adventures and uncover more delights that are bound to become staples in your kitchen.
With each culinary endeavor, you’re embracing the joy of creation and the delight of sharing nourishing, homemade goodness with yourself and your loved ones. Here’s to your journey in the world of flavors and traditions, where every recipe tells a unique story.


2 Comments